
We test products ourselves and may earn a commission when you buy through our links, at no extra cost to you. Read our affiliate disclosure
Quick answer: buy a Hostinger plan, open Websites → Create site → WordPress in hPanel, pick a domain (or a temporary one), create your admin login and let Hostinger install WordPress. Then spend fifteen minutes on setup: permalinks, sample content, a theme, a cache plugin, an SEO plugin, your key pages and the menu.
We followed every step below on 15 November 2026, on the same Hostinger account that hosts this site, and took a screenshot at each one. The test blog used a free temporary domain, so you can follow along before you have bought a domain name. Personal details in the screenshots are blurred.
What you need before you start
- A Hostinger hosting plan. Any plan that includes WordPress hosting works. We used our Business plan. If you are still choosing, read our guide to choosing blog hosting or our Hostinger review first.
- A domain name, or nothing yet. Hostinger can give you a temporary domain and you connect your real one later.
- An email address you check. WordPress sends password resets and error alerts there.
- About 15 minutes. The install itself took about a minute in our test.
Part 1: Create the WordPress site in Hostinger
Step 1: Open Websites in hPanel
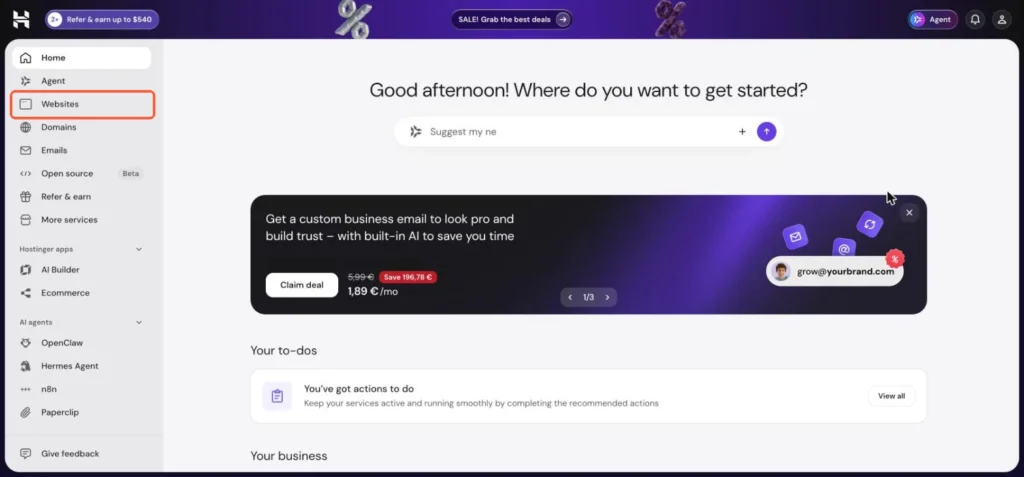
Log in to hPanel, Hostinger’s control panel, and click Websites in the left menu.
Step 2: Create site → WordPress
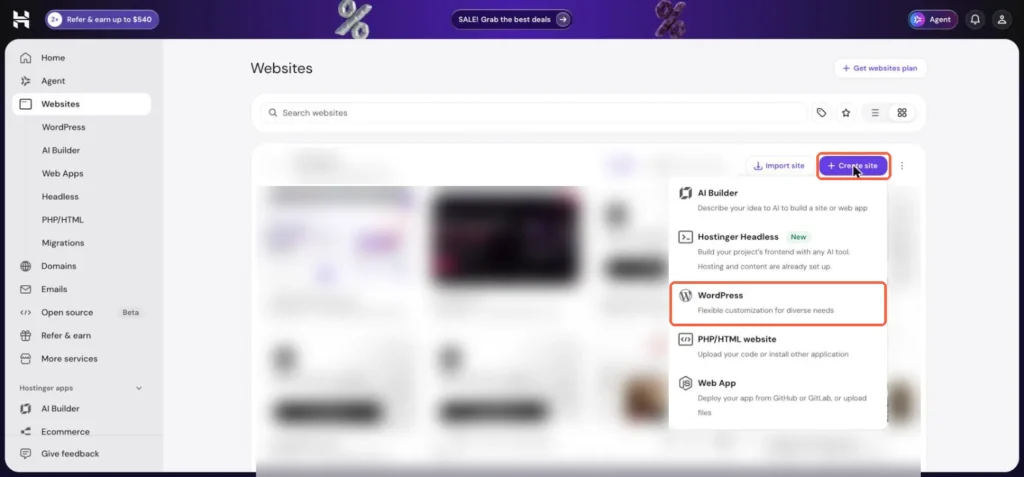
Click Create site at the top right of your plan, then choose WordPress. The other options build a site with Hostinger’s AI builder, a headless setup or plain PHP, which are not what you want for a classic blog.
Step 3: Choose a domain
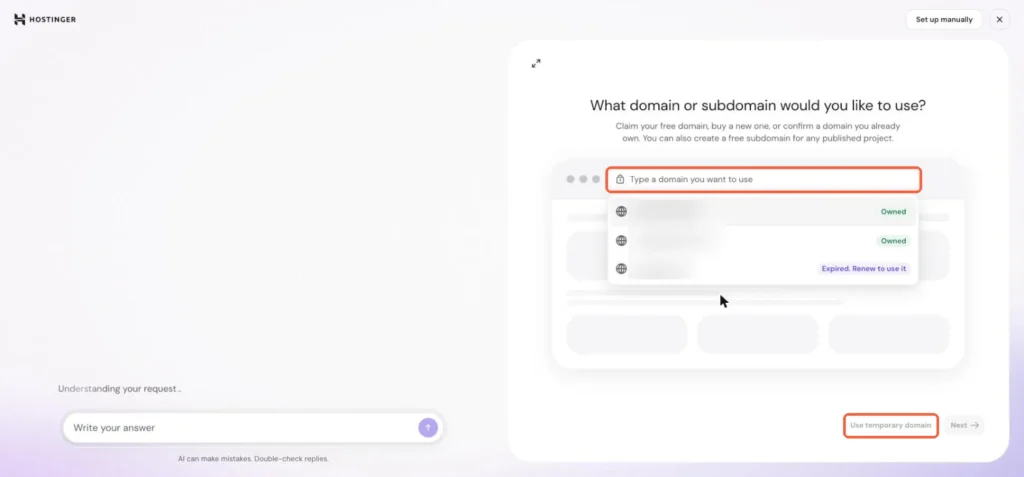
Type the domain you want to use, or pick one you already own. No domain yet? Click Use temporary domain. Hostinger generates an address ending in hostingersite.com, and you can switch to your real domain whenever you are ready.
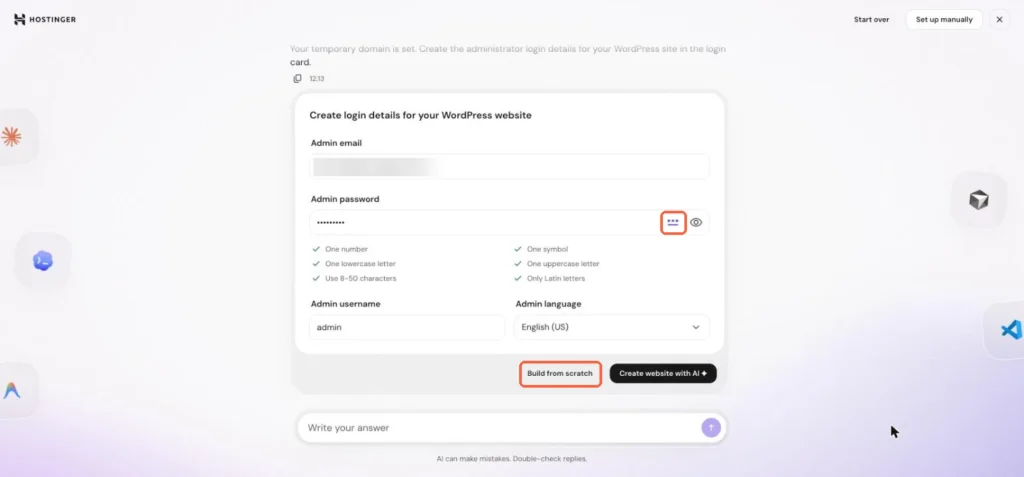
Step 4: Create your WordPress login
Enter the admin email, then click the small generator icon in the password field to create a strong password. Save it in your password manager before you continue. Choose the admin language, then click Build from scratch.
Two tips: avoid admin as the username if you can, because it is the first one bots try, and do not reuse a password from another account.
Step 5: Let Hostinger install WordPress
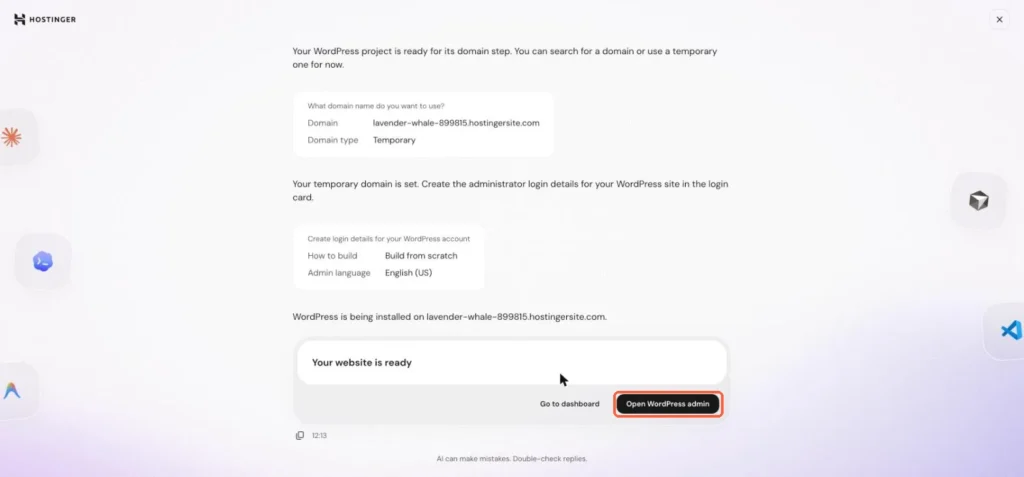
Hostinger installs WordPress and the site was ready about a minute later in our test. When you see Your website is ready, click Open WordPress admin. You are logged in automatically.
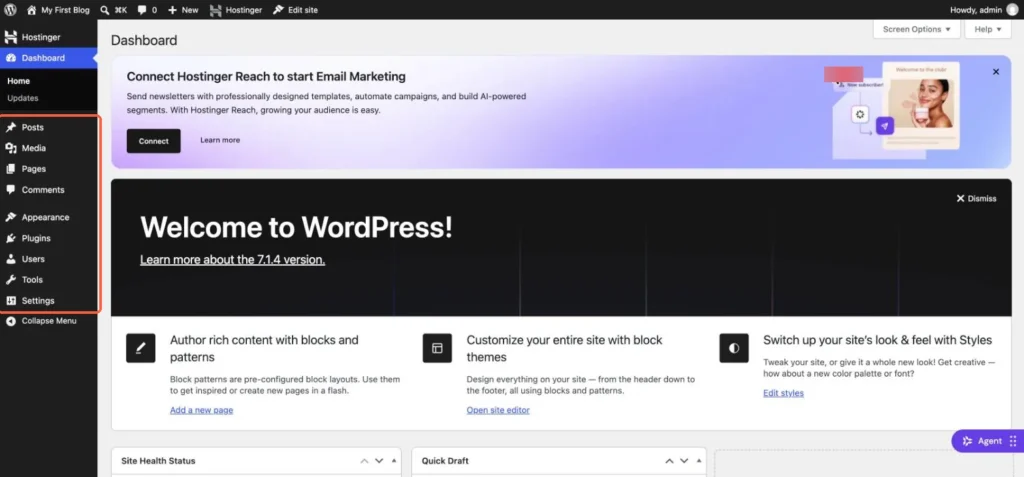
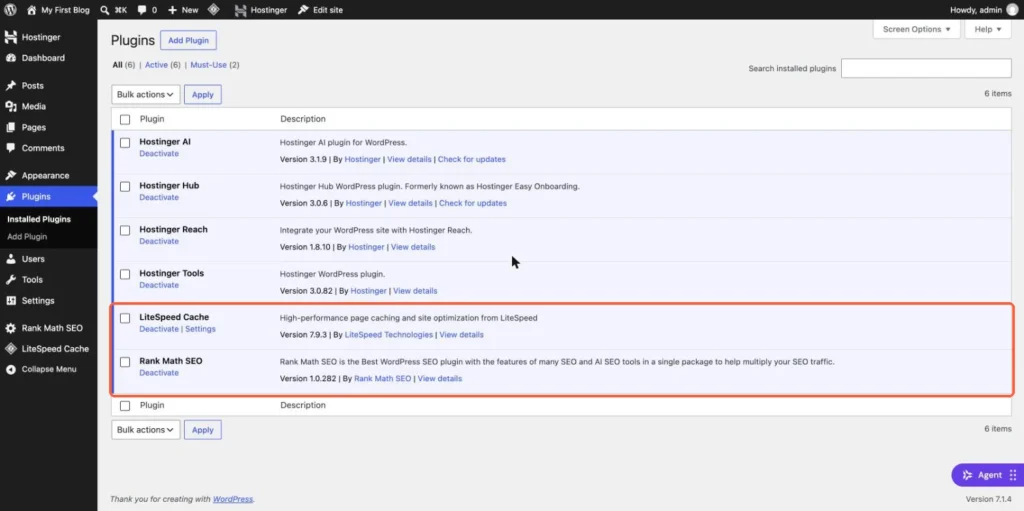
Hostinger also adds a few of its own plugins (Hostinger AI, Hub, Reach and Tools in our install). They are optional. Keep them if you use the features, and deactivate the ones you do not.
Part 2: Set up WordPress before you write
Ten minutes spent here saves you from changing URLs, deleting placeholder content and fixing menus after you have readers.
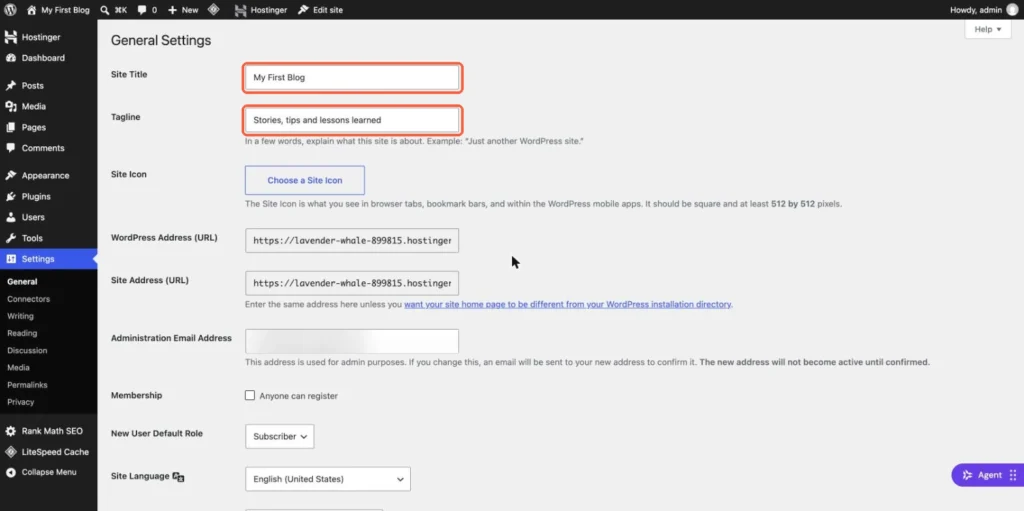
Step 6: Site title and tagline
Go to Settings → General. Set the site title and a one-line tagline that says what the blog is about. Scroll down, choose your timezone so post dates are correct, and save.
Step 7: Set permalinks to Post name
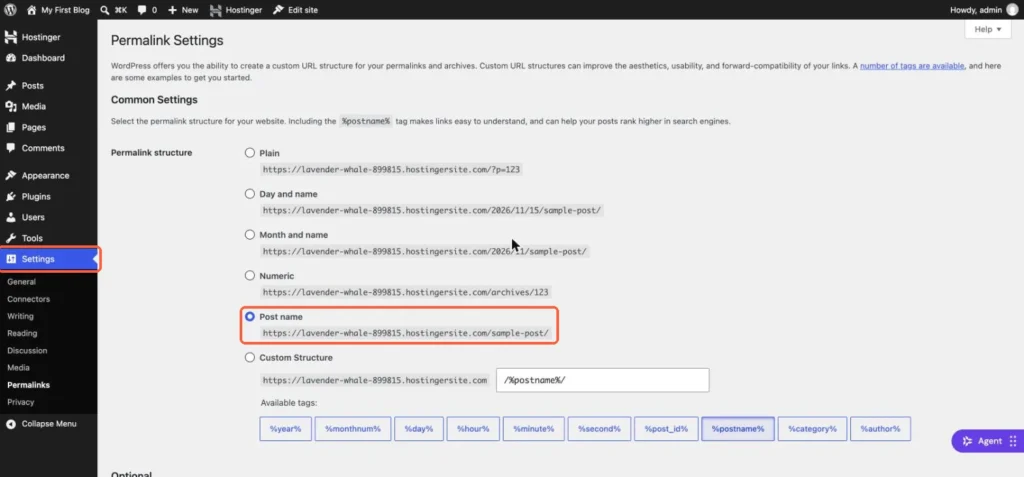
Open Settings → Permalinks and make sure Post name is selected. Your URLs then look like /how-to-start-a-blog/ instead of /?p=123. Set this before you publish, because changing it later changes every URL on the site.
Step 8: Delete the sample content
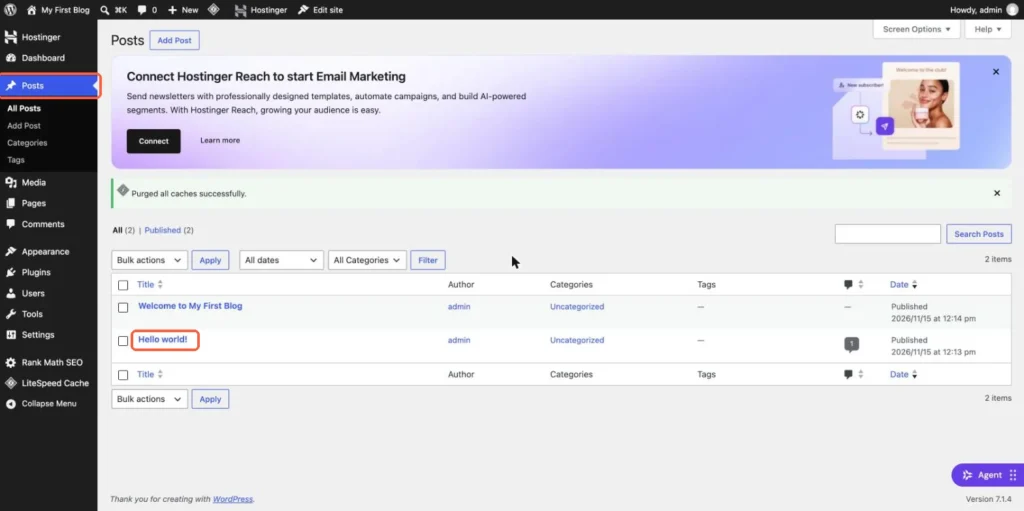
WordPress ships with a post called Hello world!, a sample comment and a sample page. Open Posts, hover over Hello world! and click Trash. Do the same under Pages. Placeholder content looks unfinished to readers and to Google.
Step 9: Choose a theme
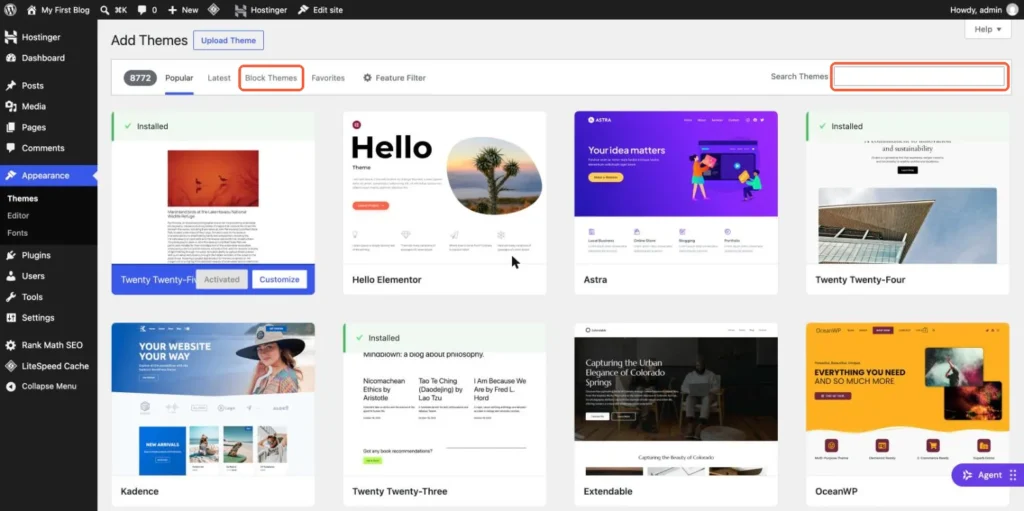
Go to Appearance → Themes → Add Theme. The Block Themes tab lists themes you can edit entirely in the Site Editor, without a page builder. Preview a few, then click Install and Activate.
For a blog, favour a theme that loads little CSS and JavaScript. We explain what to check in what makes a WordPress theme fast.
Step 10: Install LiteSpeed Cache
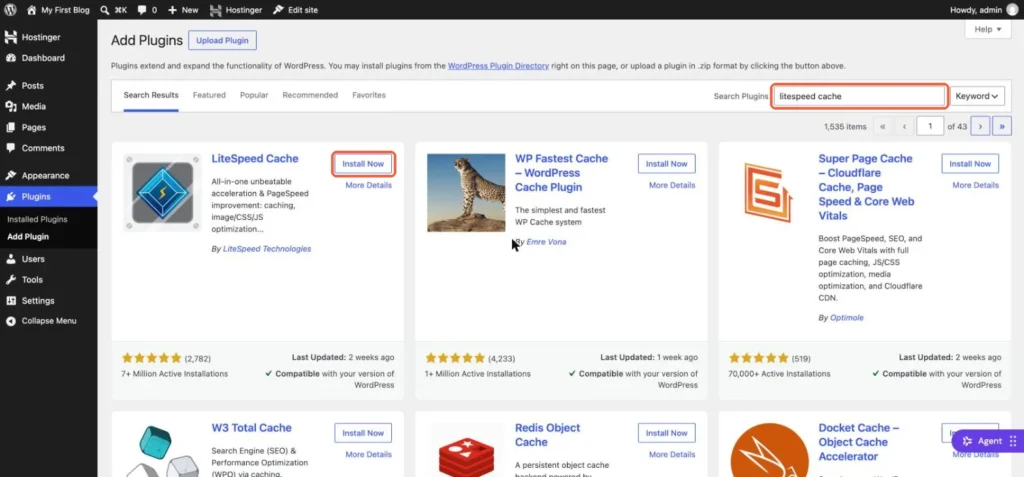
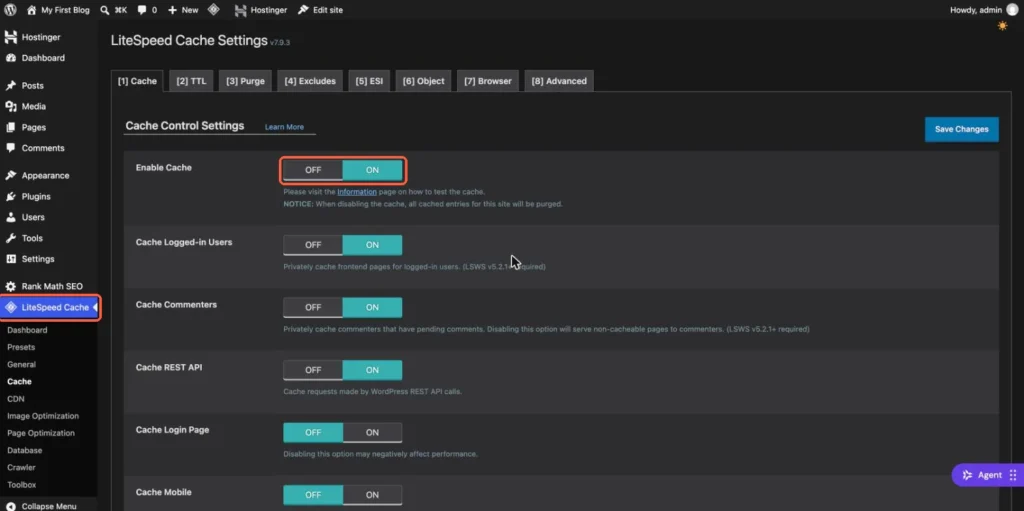
Hostinger runs LiteSpeed web servers, so the free LiteSpeed Cache plugin can serve your pages from a server-level cache. Open Plugins → Add Plugin, search for LiteSpeed Cache, click Install Now, then Activate.
Then open LiteSpeed Cache → Cache and check that Enable Cache is on. Leave the advanced options alone for now. Our LiteSpeed Cache settings guide covers which ones are worth turning on later.
Step 11: Install an SEO plugin
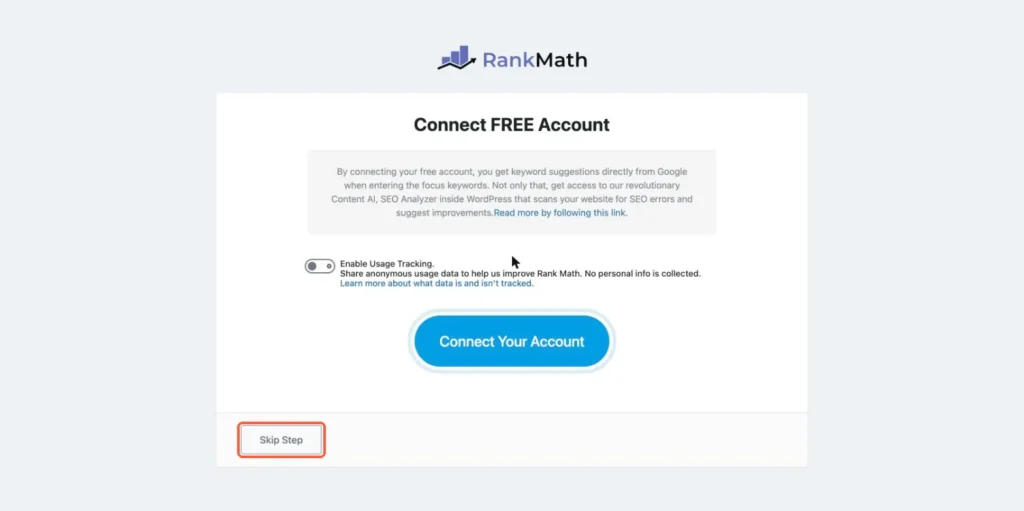
An SEO plugin lets you write the title and description Google shows, and creates an XML sitemap. Install one from Plugins → Add Plugin. We used Rank Math: its setup wizard asks you to connect a free account, which you can skip, then walks you through the sitemap settings. Not sure which to pick? See Rank Math vs Yoast SEO.
Two plugins are enough to launch. Every extra plugin is one more thing to update and one more thing that can break.
Step 12: Create your key pages
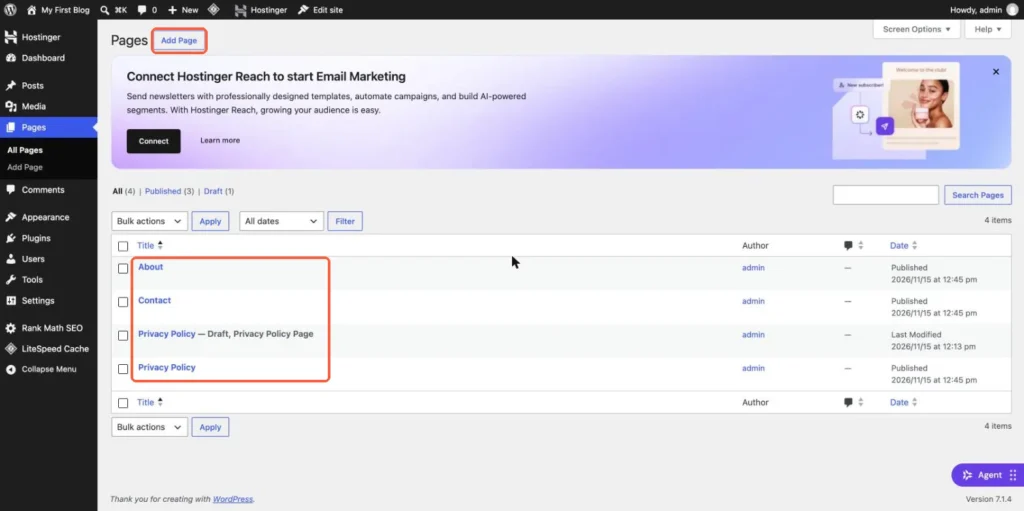
Open Pages → Add Page and create the pages every blog needs:
- About: who writes the blog and why readers should trust it
- Contact: an email address or a contact form
- Privacy Policy: WordPress already includes a draft under Settings → Privacy that you can edit and publish
Step 13: Add categories
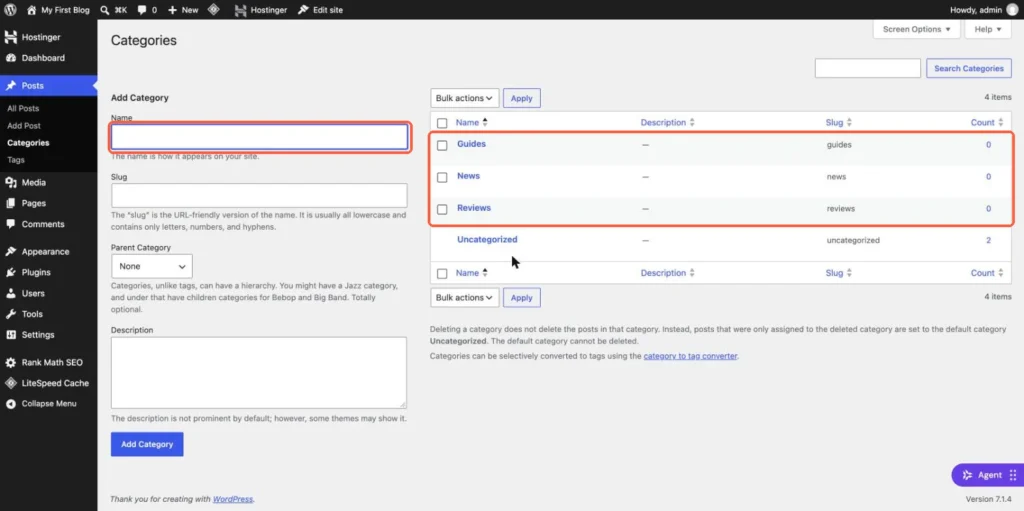
Under Posts → Categories, add three or four main topics you will write about. Categories group your posts and give each topic its own archive page. Rename Uncategorized to your main topic too, because WordPress uses it as the default.
Step 14: Build the menu and pick your styles
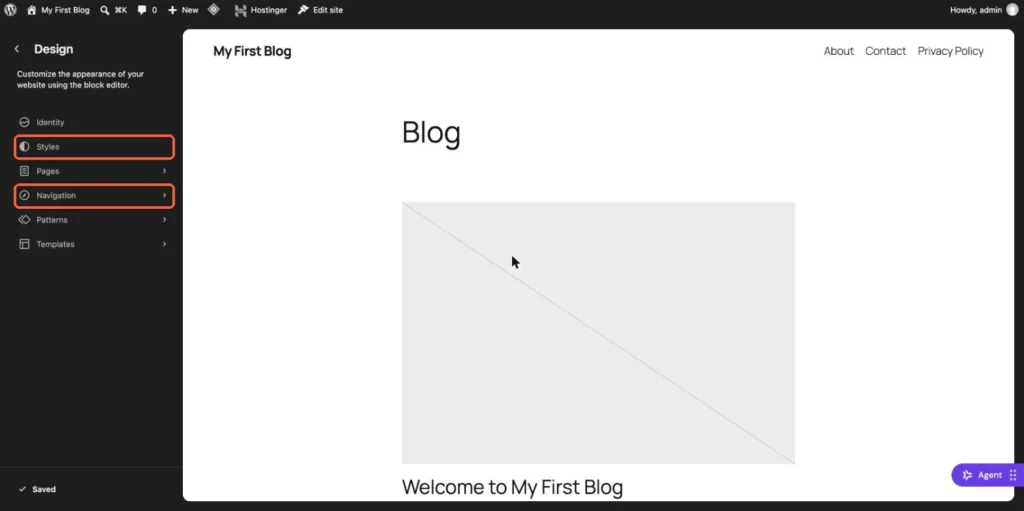
With a block theme, open Appearance → Editor. Under Navigation, add your pages and categories to the main menu. Under Styles, choose colours and fonts. Changes apply to the whole site.
Step 15: Write and publish your first post
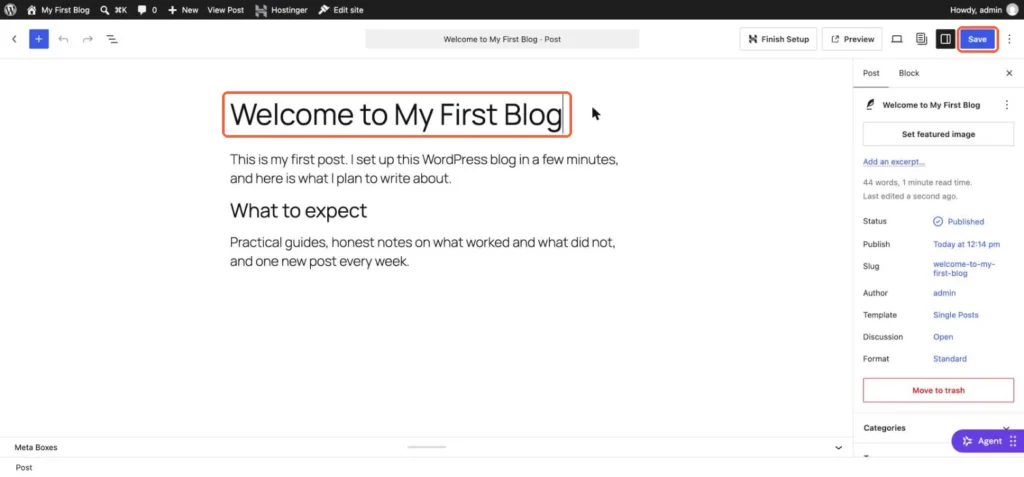
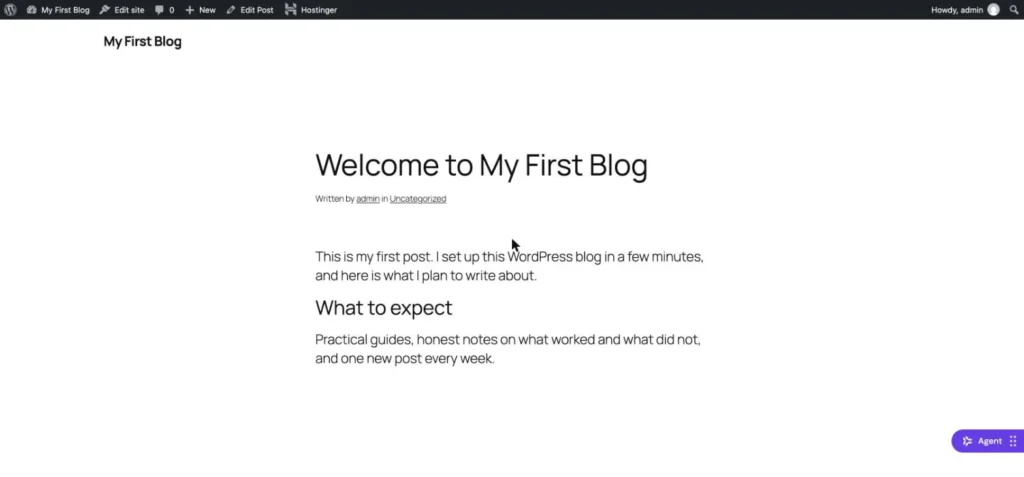
Go to Posts → Add Post. Give it a clear title, write your first paragraphs, choose a category in the sidebar and click Publish.
What to do next
- Connect your real domain in hPanel when you are ready, and check that HTTPS is active
- Add the site to Google Search Console and submit the sitemap your SEO plugin created
- Test your speed with PageSpeed Insights. Our WordPress speed guide explains what to fix first
- Publish on a schedule, even if it is one post a week
Before you change anything big later, take a backup. Hostinger plans include automatic backups, but how often they run depends on your plan.
Frequently asked questions
How long does it take to start a WordPress blog on Hostinger?
The WordPress install took about a minute in our test. With the setup steps in this guide, plan for 15 to 30 minutes before your first post.
Can I start without a domain name?
Yes. Hostinger offers a temporary domain during setup, and you can connect your own domain to the same site later.
Do I need to install WordPress manually on Hostinger?
No. Choosing WordPress under Create site installs it for you, including the database and the admin account.
Which plugins should a new blog install first?
A cache plugin and an SEO plugin. On Hostinger’s LiteSpeed servers, LiteSpeed Cache is the natural choice for caching. Add other plugins only when you need a specific feature.
Should I keep the Hostinger plugins?
They are optional. Keep the ones whose features you use and deactivate the rest. WordPress works normally without them.

Leave a Reply