
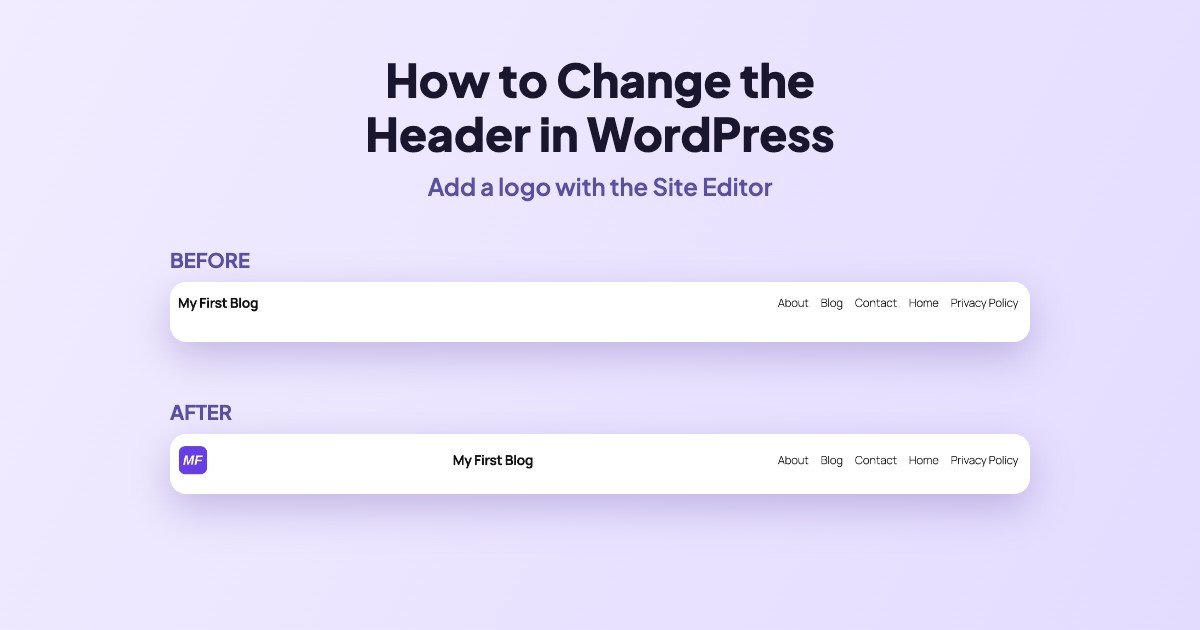
To change the header in WordPress with a block theme, go to Appearance → Editor → Patterns → Header, open the header, edit or add blocks (logo, menu, buttons), and click Save. The change applies to every page that uses that header.
On our WordPress 7.1.4 test site (Twenty Twenty-Five), we added a logo to the header on 16 November 2026. The default header only shows the site title and the menu.
Before

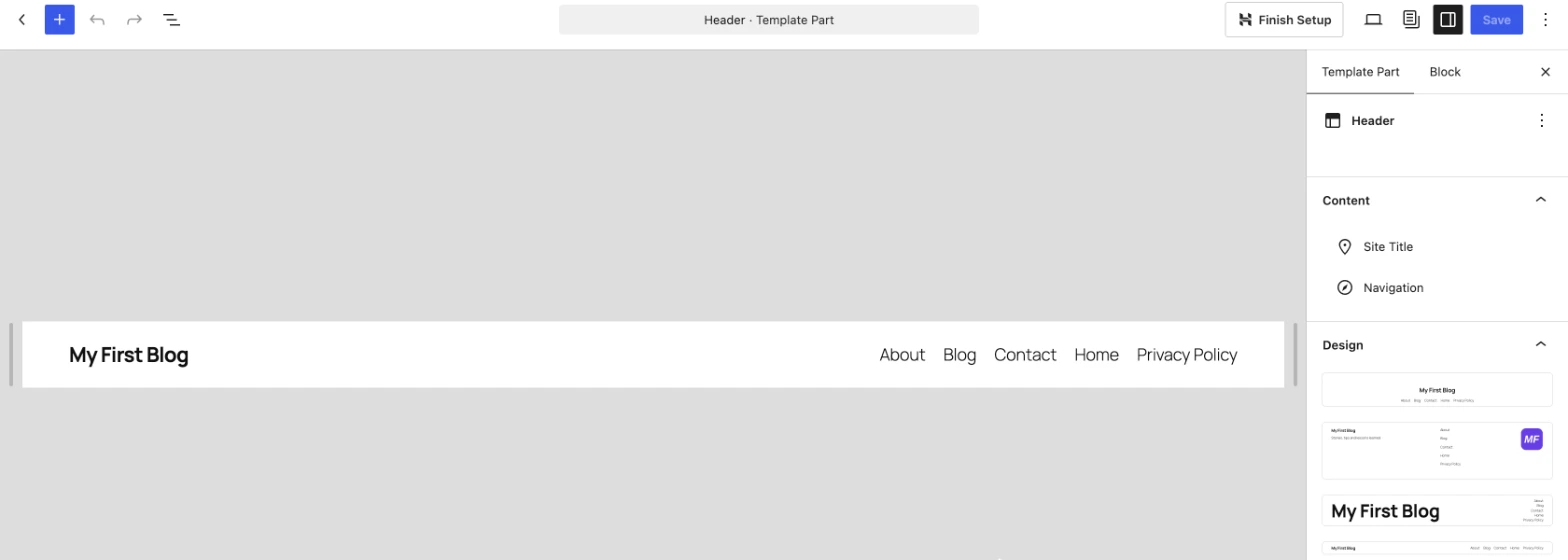
Step 1: Open the header template part
Go to Appearance → Editor → Patterns, click Header under Template parts, and open the header your site uses. The sidebar lists what is inside (Site Title, Navigation) and, under Design, alternative header layouts you can switch to in one click.
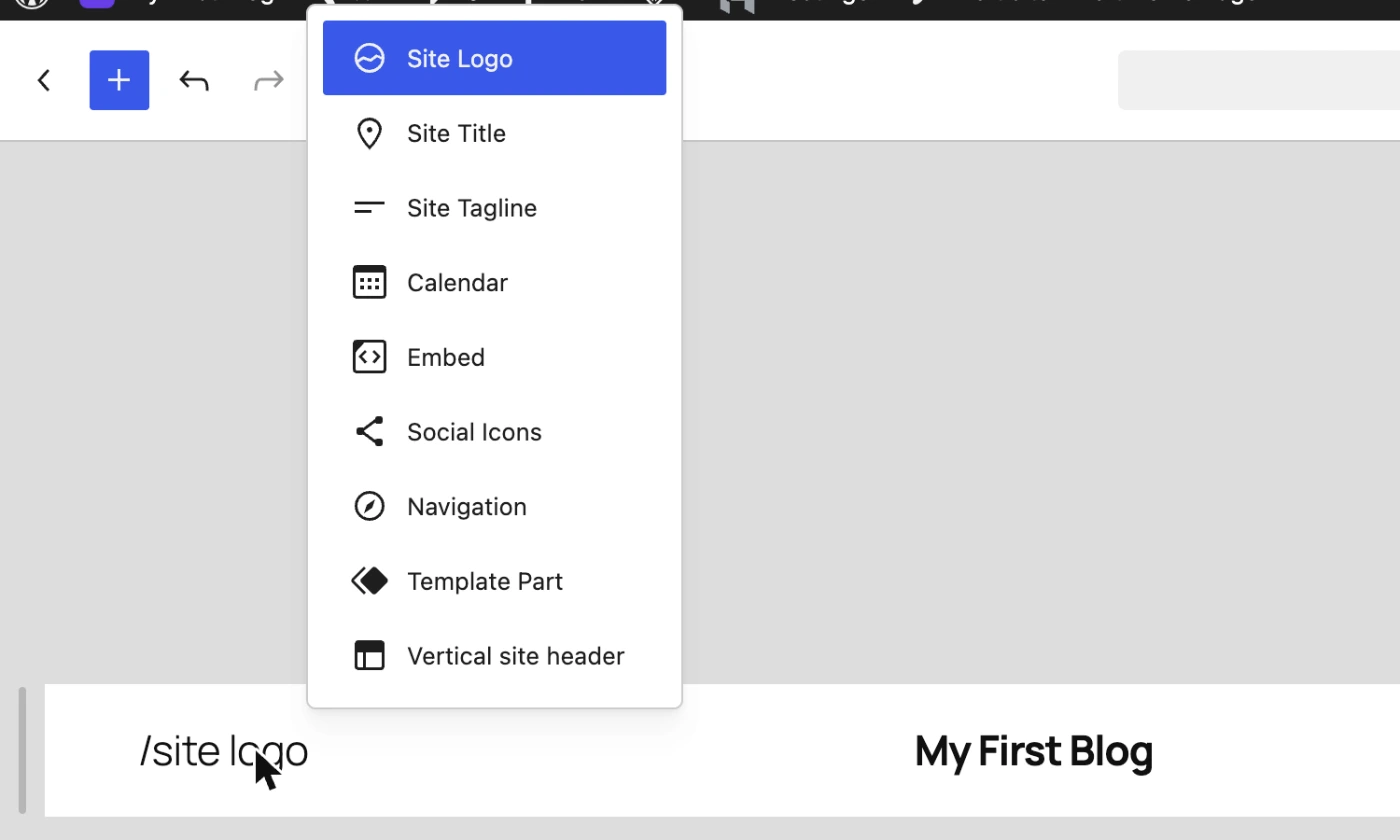
Step 2: Add a Site Logo block
Click the site title, press Ctrl+Alt+T (Windows) or Cmd+Option+T (Mac) to add an empty block before it, type /site logo and press Enter. You can also use the blue + inserter at the top left and search for “Site Logo”.
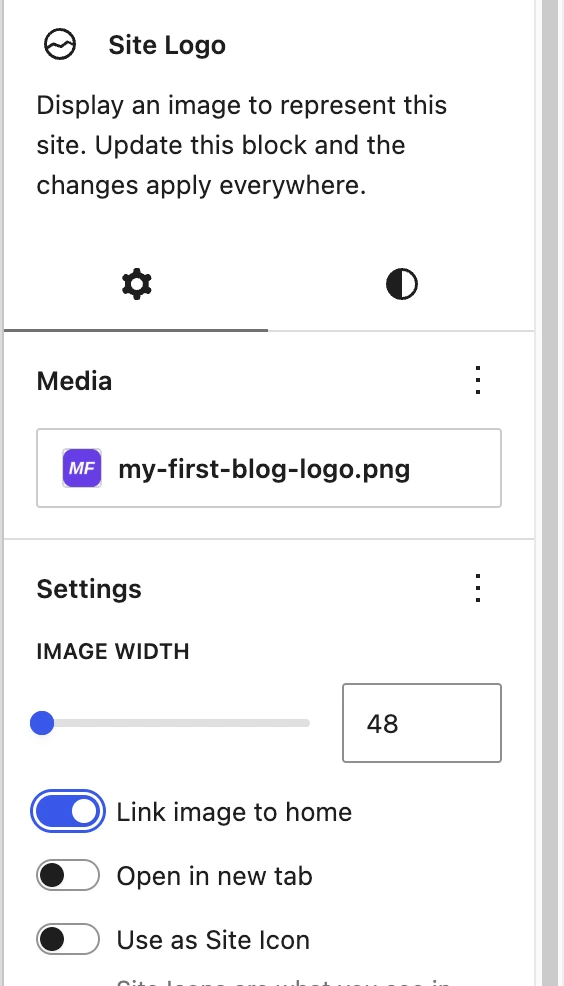
Because we had already set a logo in Identity, the block showed it straight away. If you have none yet, the block lets you upload one.
Step 3: Set the logo size
With the logo selected, set Image width in the sidebar. It started at 120 px, which was too big for this header, so we used 48 px. Link image to home was on by default.

Step 4: Save
Click Save at the top right, then check your site (purge your cache if you use a caching plugin).

What we noticed: the site title moved to the middle. The header row spreads its blocks across the width, so with three blocks the title ends up in the center. If you want logo and title together on the left, select both and group them (block toolbar → Group) so they act as one block.
Other header changes you can make the same way
- Edit the menu: click the Navigation block to add, remove or reorder links.
- Add a button: insert a Buttons block (for example “Contact”).
- Switch layout: pick another design in the sidebar Design list.
- Classic themes: look in Appearance → Customize (often a “Header” section) or the theme’s own options page.
Frequently asked questions
Why doesn’t my logo show in the header?
Your header has no Site Logo block. Setting a logo in Identity is not enough; add the block as shown in Step 2.
Will a theme update undo my header changes?
No. Site Editor changes are saved in your database, not in the theme files.
Can I have a different header on some pages?
Yes, with templates: assign a template that uses another header template part to those pages.

Leave a Reply